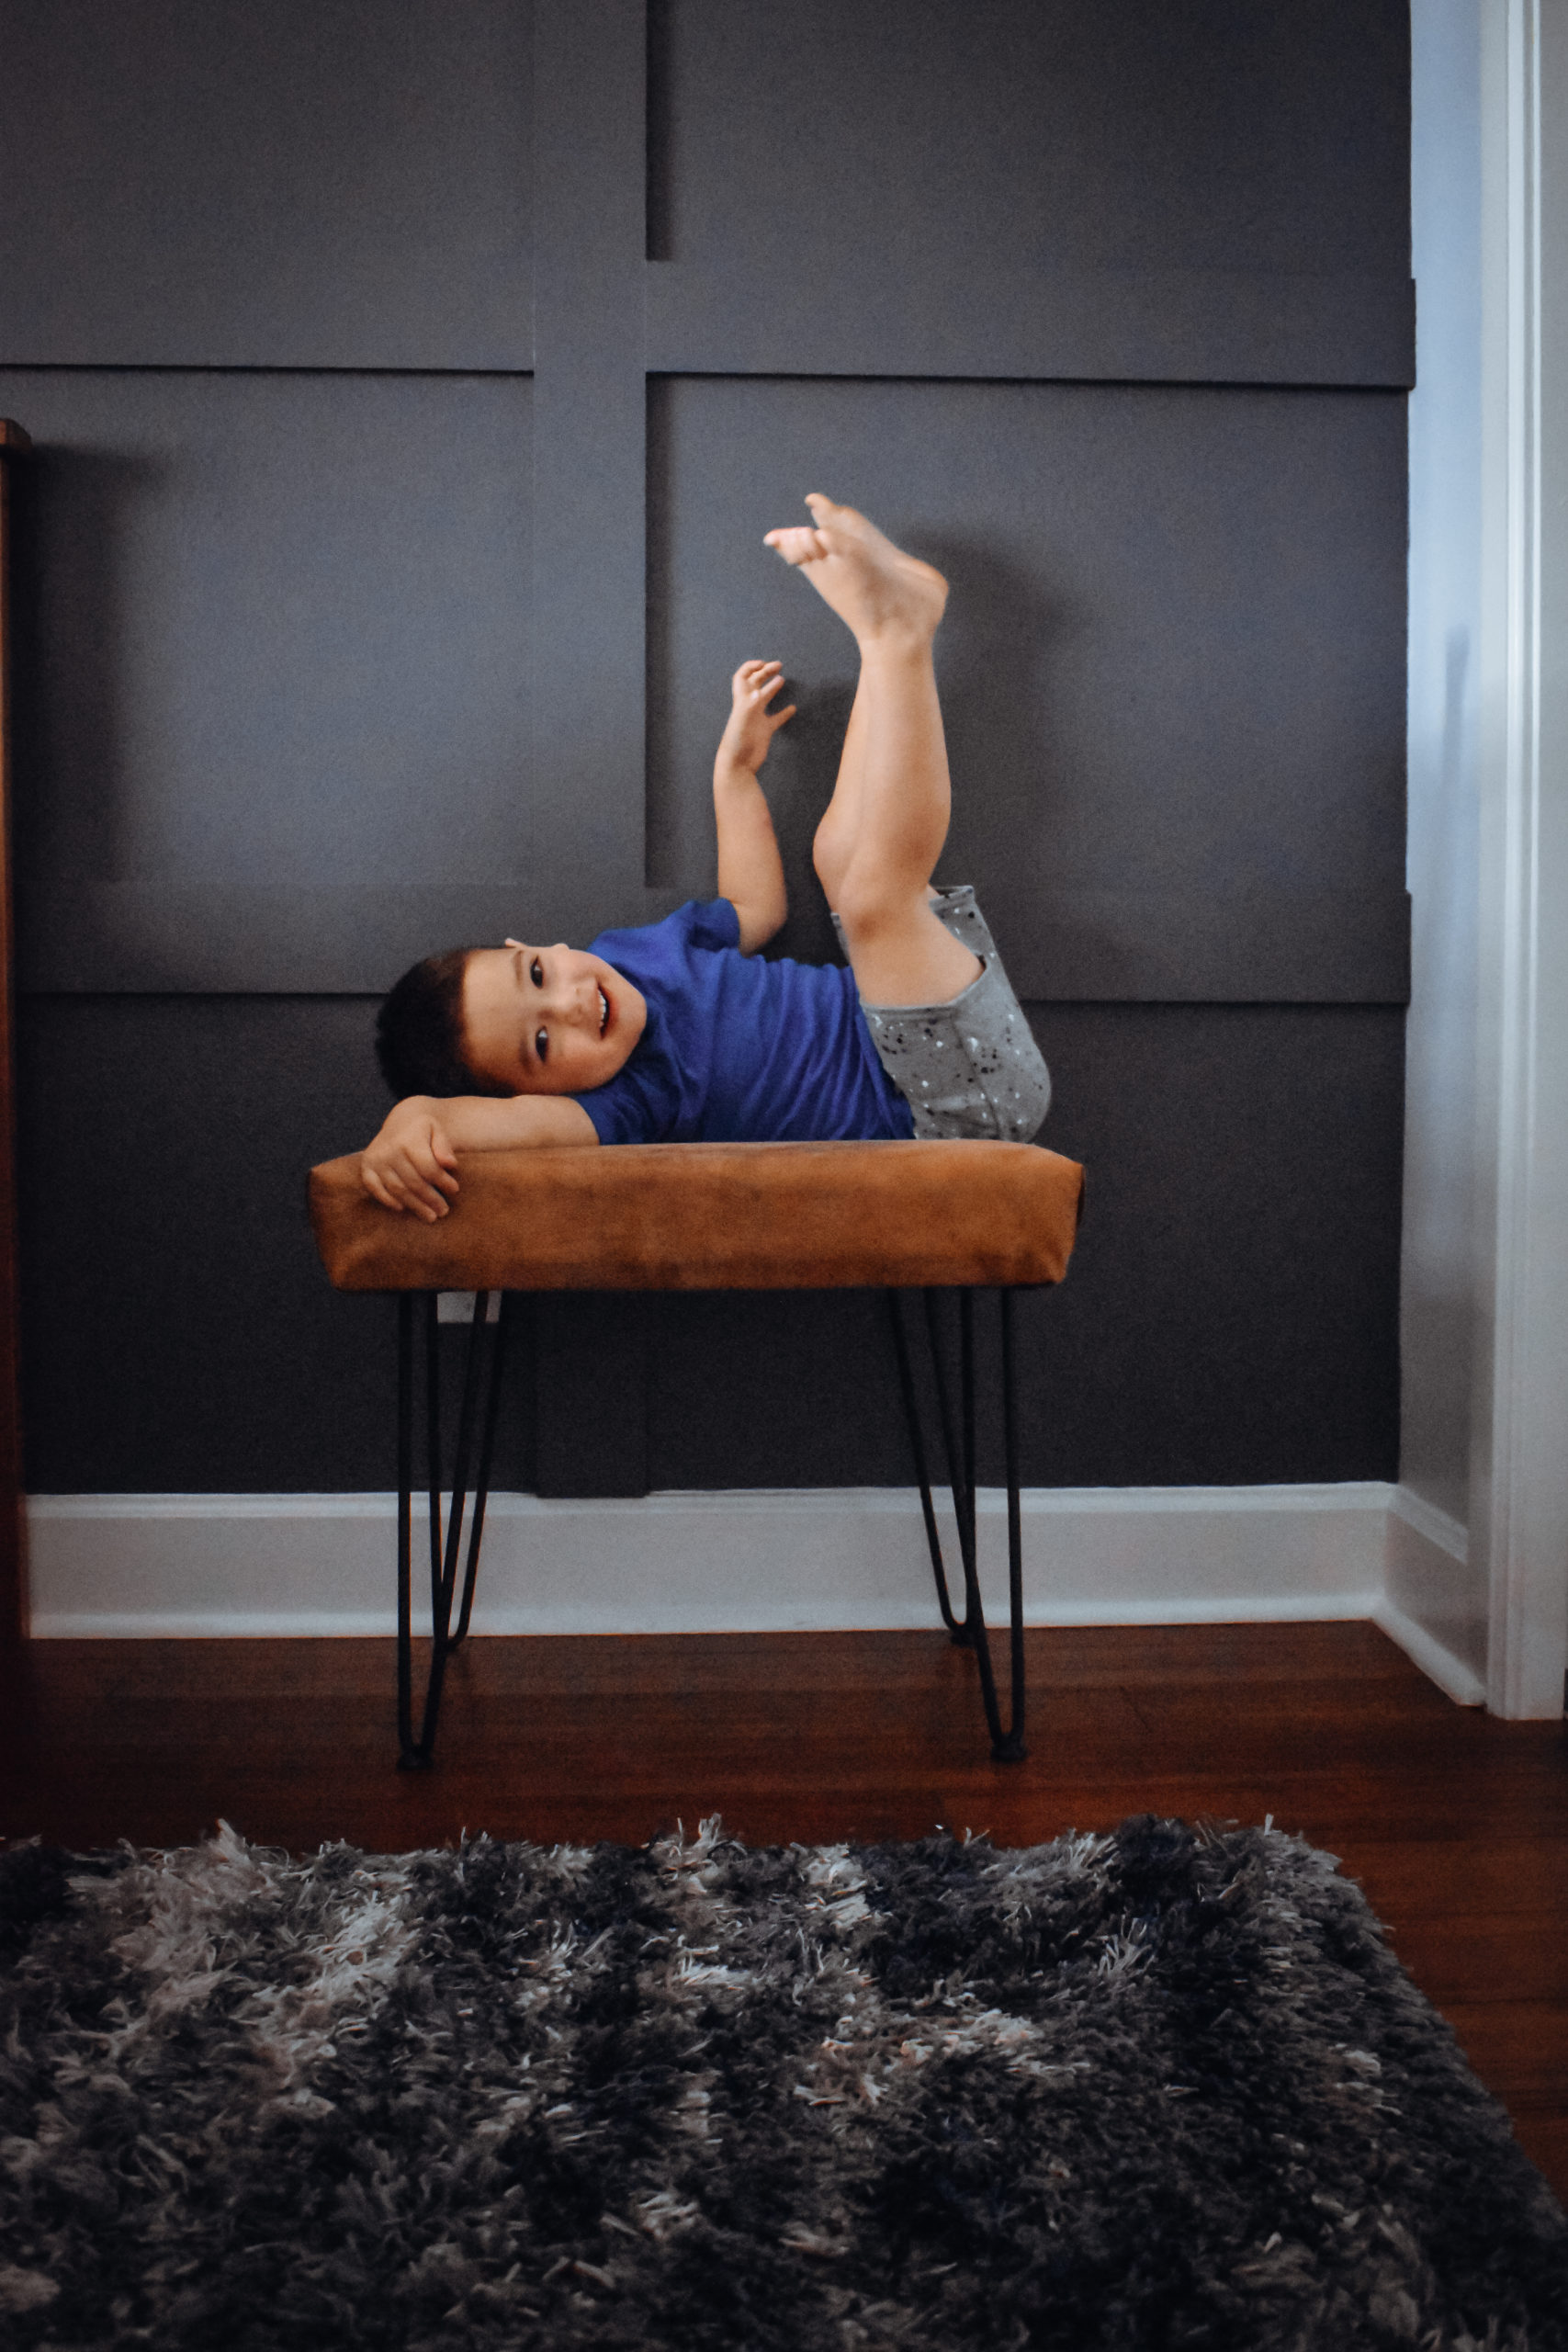
[…] him to have a place to go and play with toys that Madeline couldn’t reach. So we made him a DIY Bench to sit on and above I wanted something other than shelves with knick knacks on […]
This is one of those DIY’s that came about because I needed something custom size and height. I do believe though, I ended up on the less expensive side as well. Which is always a happy coincidence.
We recently moved a desk into Sebastian’s room. I wanted him to have somewhere to put his “small toys” that were out of Madeline’s reach and somewhere that was all his own. Little sisters tend to take over stuff.
I looked for a stool for him but I couldn’t find a “stool” big enough (wide enough to be exact) or an ottoman tall enough. So, I set out to make him one myself.
What you’ll need:
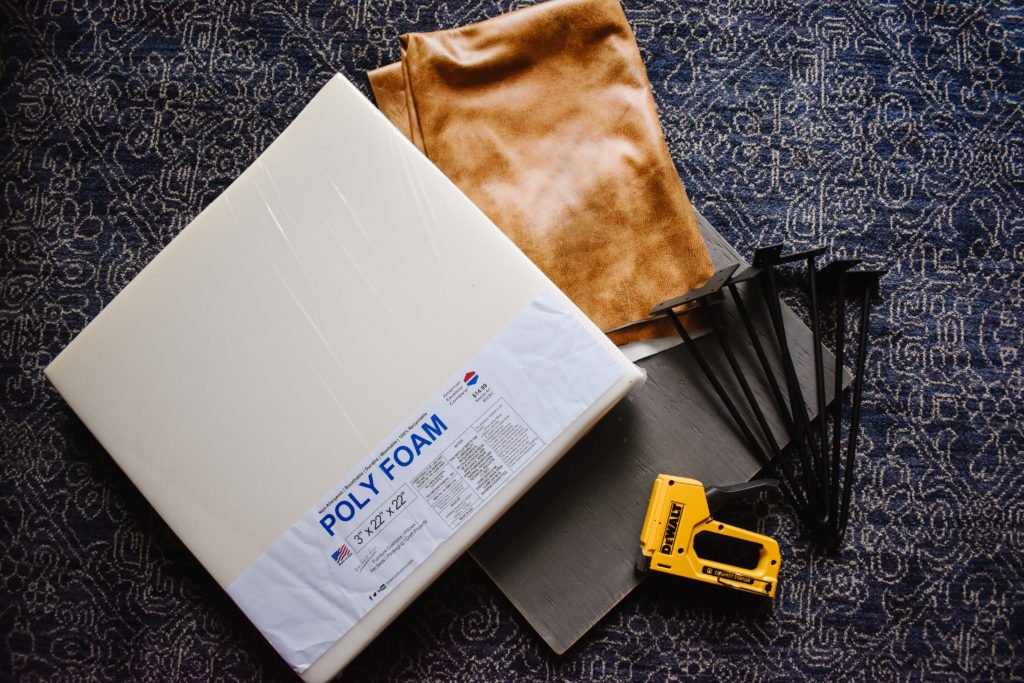
First thing I did was cut my plywood to size. I went with 21″ x 18″ because that is what I needed for my bench. Home Depot and Lowes will cut wood down to size for you at no extra charge. You do have to buy the entire piece of wood but there are smaller pieces of Plywood there, you do not have to cut down from a giant sheet. I also sanded my edges so the corners were not so sharp.
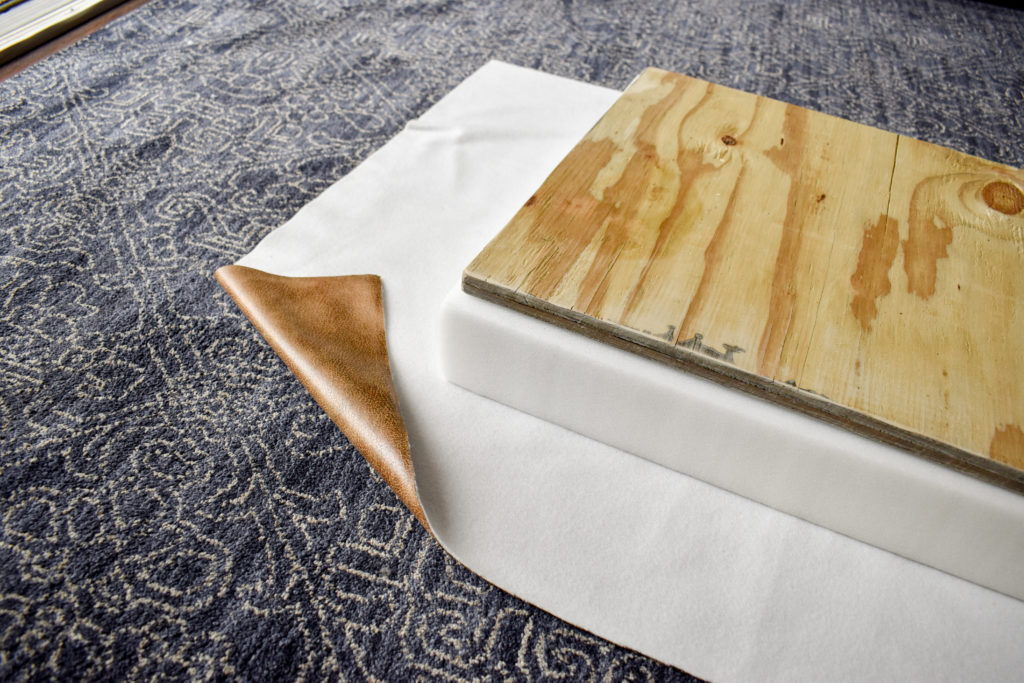
Next, I cut my foam down to size – about 1/2″ bigger than my plywood. I bought a faux leather from Hobby Lobby to use for my fabric. You can use any fabric you’d like – However, I would choose a heavier type like a canvas or faux leather as they are more durable than a cotton fabric.
For this size bench a 1/2″ yard was plenty of fabric. I layered my fabric down first, then my foam then the plywood piece.
Using the staple gun I pulled the fabric up and over and stapled to the plywood. Essentially wrapping the foam and wood like a present.
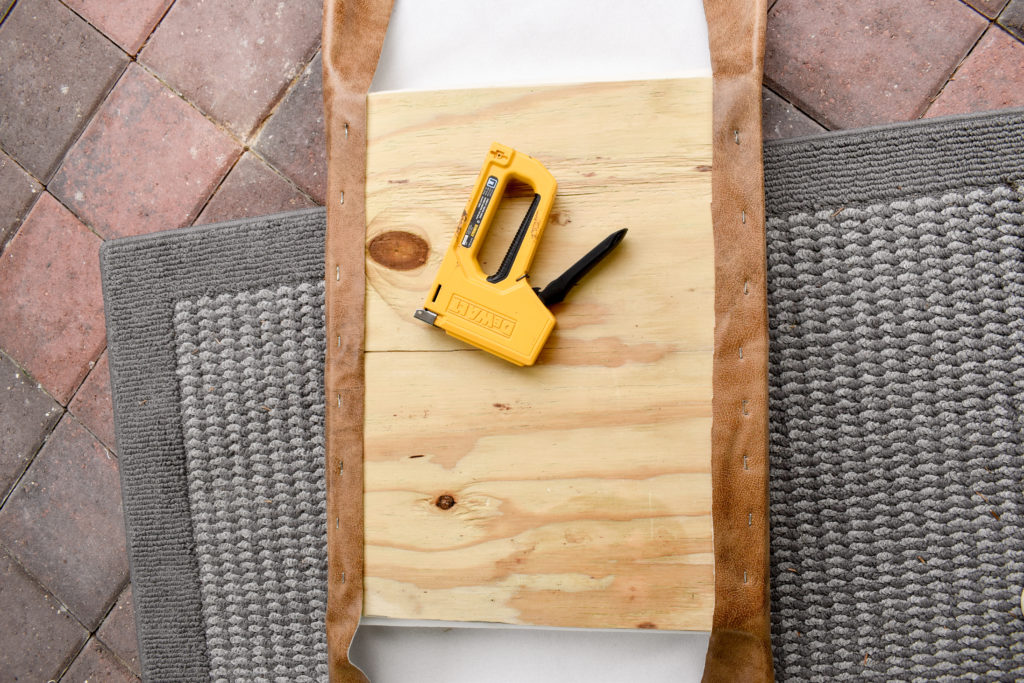
When it came to the corners I folded those as I would a present as well. Pulling fabric over and up and using a staple to hold it in place. Be sure to pull extra tight each time you put a staple in to ensure the cushion stays together.

Trim any excess. I knew I wanted the overall height of my bench to be close 16″ so knowing that my wood and foam would make up about 4″ – 5″ I went with 12″ hairpin legs. I found mine on amazon and they came with everything you need to attach them. You can find my exact ones HERE

I simply attached each leg to the four corners with the screws provided. Note: I would say it helped that I had about a 1″ thick piece of plywood as the screws were a decent length. However, if you have a 1/2″ thick piece of plywood lying around that you could use … use it. Don’t go out and buy more.
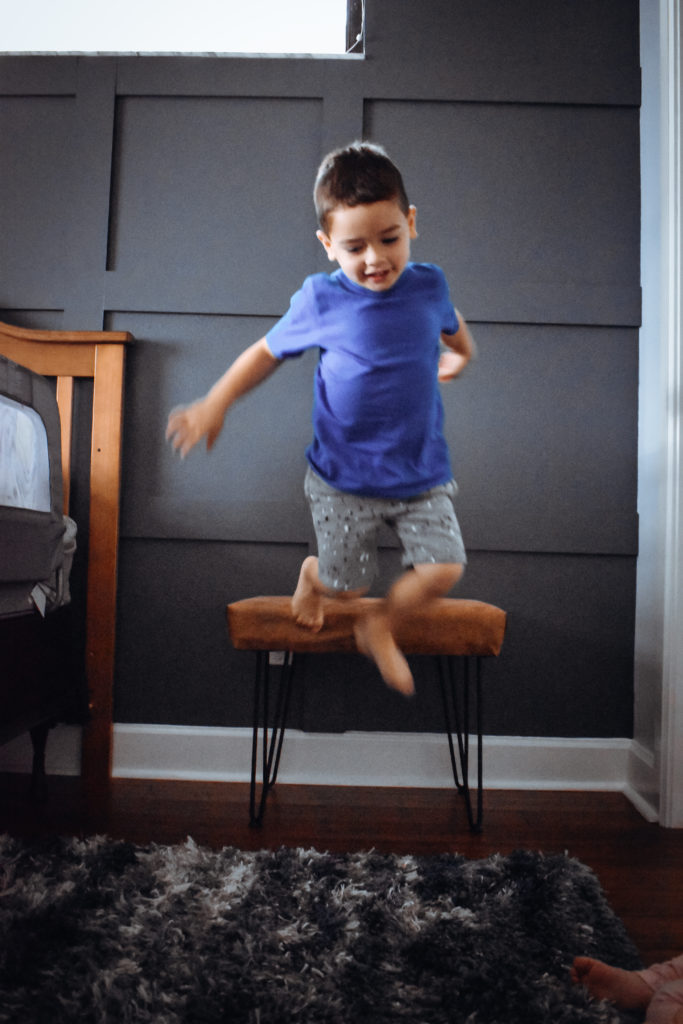
There you have it! A perfect size bench for a sweet little boy. He loves it and now can reach all his toys that his sister is not allowed to touch!
If you make your own DIY Bench … Tag me! I’d love to see!
Instagram: @jessica.dawn.home | Facebook: Jessica Dawn Home
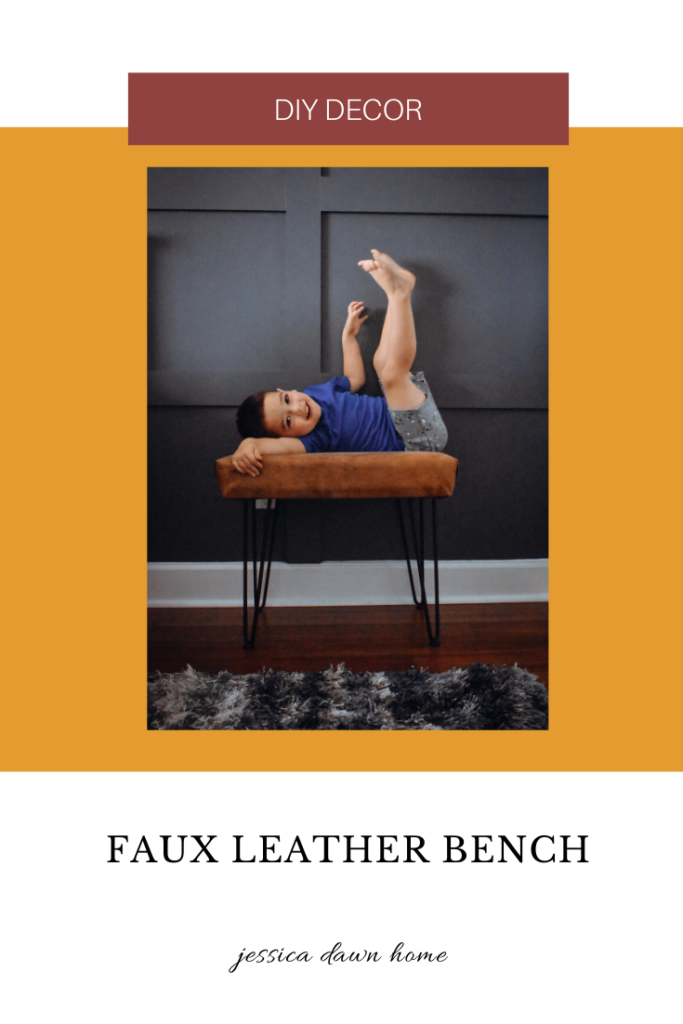
DIY diy bench diy furniture do it yourself faux leather bench make your own furniture
[…] him to have a place to go and play with toys that Madeline couldn’t reach. So we made him a DIY Bench to sit on and above I wanted something other than shelves with knick knacks on […]